A step-by-step guide of the Tera Kaia Basewear Repair process.
Once you have worn your Basewear into the dirt (which we know you will) you can extend its life and keep it out of landfill with a Basewear Repair. Repairing your TK tops can be a lengthy but fun DIY process. In most cases, there are only a few things that need to be adjusted or repaired before your Basewear makes its way back into the wild.
The result of your repair is a beautiful new Basewear design and the gratifying feeling of a job well done. Not only are you taking sustainability into your own hands, you’re going to get to love your Basewear on even more adventures.
Can I still purchase a Basewear Repair Service and have your team fix my Basewear? Our Basewear repair program is currently closed to the public. We do plan to re-open it to TK supporters, but it will be a VIP perk for something we are working on! Want an early in? Email us at info@terakaia.com to get more information.
Disclaimer: Sewing Basewear Repairs is, quite frankly, pretty difficult. We recommend approaching this project with a positive attitude and the expectation that something may go wrong. If it does your problem solving skills may be required to complete your repair. If nothing else, it’ll be a good learning experience!
So, proceed forward with your own caution! (If your Basewear repair goes south, you can always email us - we won’t be able to fix it for you but we can give you a discount code on a new item.)
Follow the steps below as our Repair Tailor Hannah walks you through specific instructions on how to bring your Basewear back to life.
Step 1: Gather your sewing supplies.
Here’s what you need to complete a Basewear Repair on your own.
Basewear Repair Supply List:
Straight Stitch Sewing Machine
Coverstitch Sewing Machine and/or Serger Sewing Machine (recommended for a stronger repair)
Replacement Fabric and/or Elastic
*Need some scrap fabric or elastic for repair? Email us at info@terakaia.com and we’ll send you some for free! We keep all the scraps from our prototyping process and repurpose them so they don’t end up in a landfill.Pins
Seam Ripper
Ruler and/or Curved Ruler
Step 2: Inspect Your Basewear to see what needs to be repaired.
Take a look at your Basewear - it’s been through a lot. Focus in and identify key parts of the top that need to be replaced. Ask yourself the following questions as you inspect your repair:
Do the straps need to be tightened?
Has the elastic band become worn out and loose?
Is the fabric stretched out or pilled in a certain area?
Have any of the seams ripped?
Have any of the straps popped?
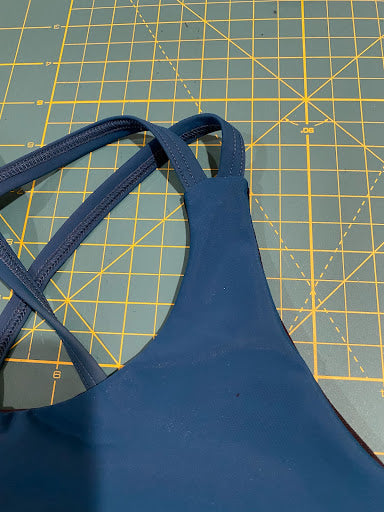
Check the straps.
Assess the length and elasticity of the straps. Over time the straps may loosen and may need to be shortened.
If you are going to shorten the straps, first try your top on. Pinch the straps at your shoulder to determine how much they need to be shortened. Make a note of approximately how much of the straps you want to cut off.
How difficult of a Basewear Repair are you comfortable with?
There are three types of Basewear Repairs, ranging in difficulty. If you are new to sewing or don’t have access to a serger or coverstitch machine, we don’t recommend starting with a hard repair. Or, save that project for some really messed up Basewear and go into it as a learning experience.
-
Simple Repair (Beginner-ish):
Shortening Straps
Repair Popped Stitch
Repair Popped Strap
-
Full Repair (Intermediate)
Grafting in New Fabric Patches
-
Band Replacement (Advanced)
Replacing the Elastic Band (often involves a Full Repair as well)
Step 3: Deconstruct your Basewear.
It may be emotionally jarring to rip apart your Basewear - but it has to be done for the greater good of your item! Start by cutting the straps at the seam, then seam ripping the two layers apart so that you can access the interior of the garment.
Note: Basewear is constructed inside out, then flipped right side in. The escape hole to flip your Basewear, either way, is located under the tag.


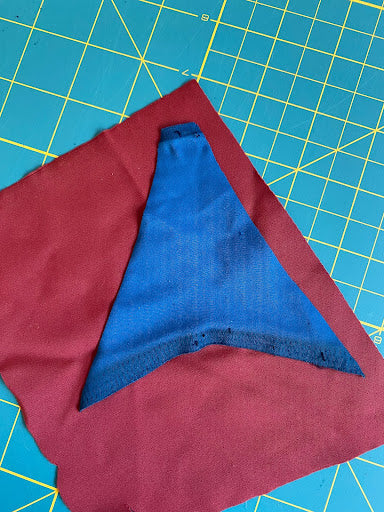
Step 4: Plan Your Basewear Repair Design
Time for the fun(ish) part! If you are doing a Full Repair, which involves grafting in new fabric, you get to pick your color palette and plan the visual design of your repair.
Hannah says: “When choosing a new design for the repaired top I try to stick with the same color tones as the original top.”
Important: Make sure to use a half-inch seam allowance when cutting out the new shape.


Step 5: Sew your Basewear Repair back together.
Now it’s time to bring it all back together. Choose the steps below that are related to the type of Repair you are attempting.
-
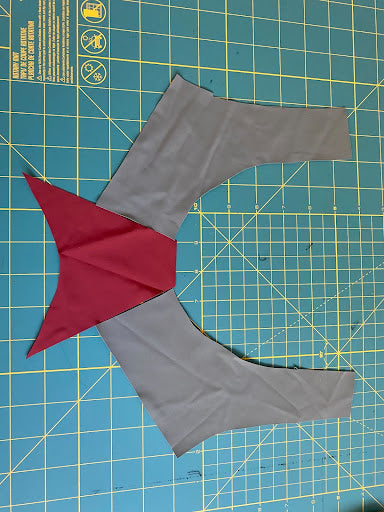
Full Repair (Intermediate)
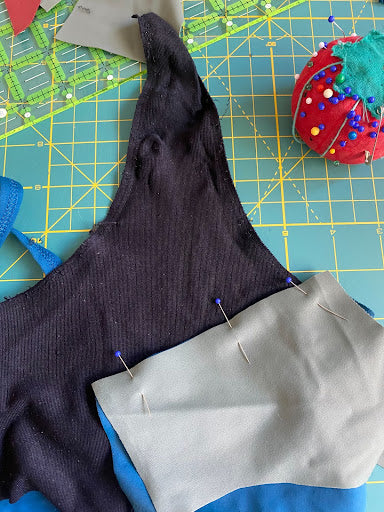
Start by sewing together your patches. Line up the pieces, pin together, then sew using a serger for a stronger stitch.
Once the patches are sewn together to create one pattern piece, line them back up to the original top, and sew them together at the seam edges.
Band Replacement (Advanced): If the elastic band was removed during the process sew it back to the bottom using a coverstitch machine.

Step 6: Strap Adjustment (Beginner-ish):
Adjust the straps to the desired length of the straps you measured back in Step 2.
Secure the straps into place using a safety pin then flip the top inside out using the escape hole at the back where the old tag was sewn on.

3. Remove the safety pins & secure the strap with pins

4. Sew straps back together using a serger, and remove pins.

5. Flip the top right side out again and repeat the last step with the other side.
Step 6: Add the Finishing Touches
You’re almost there! Just two more details to have your new Basewear Repair patched up and ready to hit the wild.
Sew the inside straps together using a diamond. If you’re not sure where to do this, try the top on and ask a friend to pin the inner straps together on your back where it is most comfortable.
Sew the tag back on, placing it just over the escape hole. You can use a straight or zig-zag stitch here. Dealer’s choice!
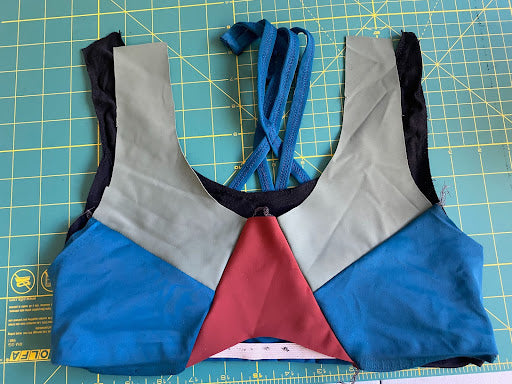
Ta-Da! Your Basewear Repair is Complete.
Well done to you! Your Basewear is Repaired and ready to be released back into the wild. Don your new design, and take a breath in. All that hard work paid off big time. You’ve empowered yourself with the knowledge of how to repair your garments and keep them out of a landfill.
Repairing your garments isn’t easy, but it is satisfying. By forming an intimate bond with your clothes you’re more likely to repair them and less likely to replace them. At this point, that’s the most sustainable option we have.

Welcome to the Journal: official blog of Tera Kaia Basewear.
Here we tell stories about the outdoors, sustainability, and life through the lens of outdoor women. Get the latest on TK events, and a "behind the seams" look at everything that's going on with our brand.
Latest from the TK Journal:

🎉2024 Time Capsule: Redefining what it means to be a clothing business.

Why $115 for a Tera Kaia TOURA ReMade Sports Bra is Totally Worth It: The True Cost of Basewear